How to create a vintage photo step by step
0
Vintage never goes out of style. There are a million and one ways to recreate a vintage look with modern tools. The key to achieving an aged-photo style without it feeling fake – emulate the softer colors and slightly blurred look of old photographs to breathe new life into modern shots.
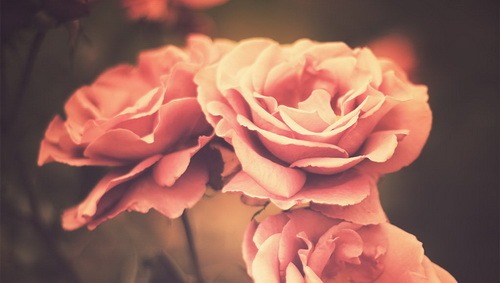
With this tutorial, we will see how to give a photo a vintage style in Photoshop (we use CS6, but any version of Photoshop or Lightroom will work).
This technique works best on images with strong, vivid colors to start with. So we picked this delightful autumn image to work on.
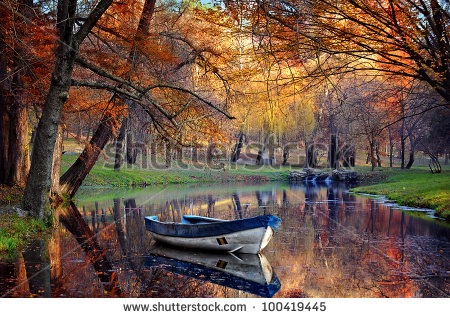
10 easy steps to create a vintage photo
Follow along step by step to make favorite photos look vintage:
Step 1. Raise the blacks
Open the image and go to “Layer > New Adjustment Layer > Levels”.
Now move the black slider to around +8 (adjust farther or closer depending on how much black the image has to begin with).
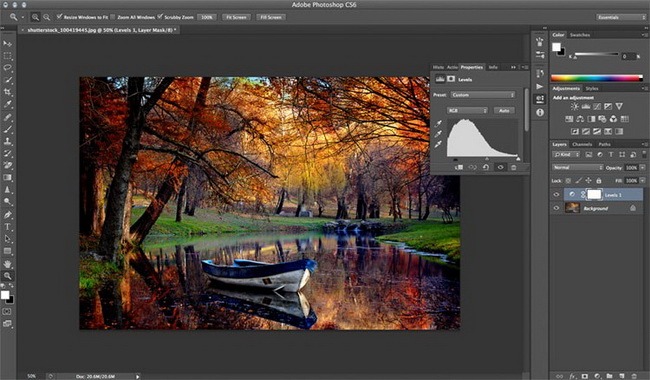
Step 2. Duplicate the layer
Duplicate the Background layer and move it to the top of the Layers stack. Right‑click it and choose “Convert to Smart Object”.
This allows revisiting applied changes at any time without deleting steps.
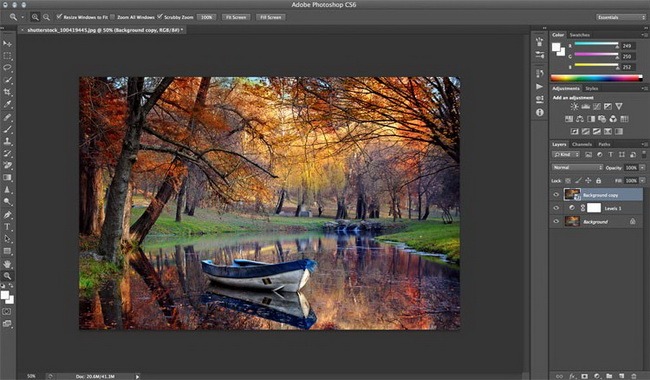
Step 3. Add a High Pass filter
In a vintage look, it is important to emphasize the original lines of the base image before applying muted tones later.
So, with the background copy layer active, go to “Filter > Other > High Pass” and set a radius of 10. Then change the layer’s blend mode to “Overlay”.
This will make the image very punchy, but don’t worry – it’s part of the process!
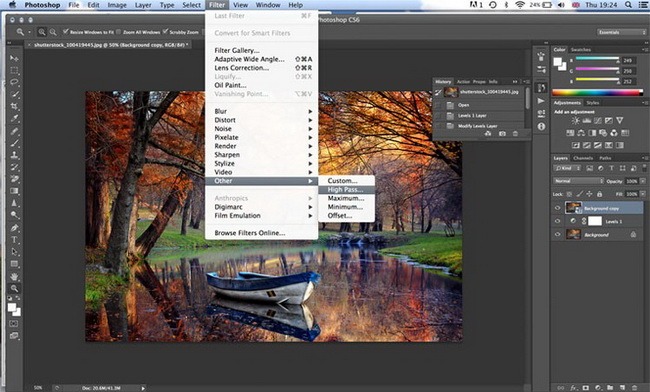
Step 4. Adjust the contrast
Now begin adding that vintage feel to the image.
Go to “Layer > New Adjustment Layer > Brightness/Contrast” and reduce contrast to -20.
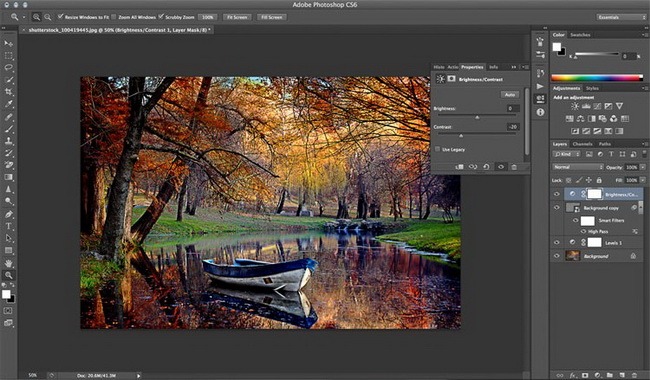
Step 5. Tweak the Curves
Add a new “Curves” adjustment layer and, using the drop‑down, adjust each channel.
For the Red and Green channels, raise highlights and lower shadows with an S‑curve. For the Blue channel, lower highlights and raise shadows.
The adjusted RGB curves should match the screenshot below.
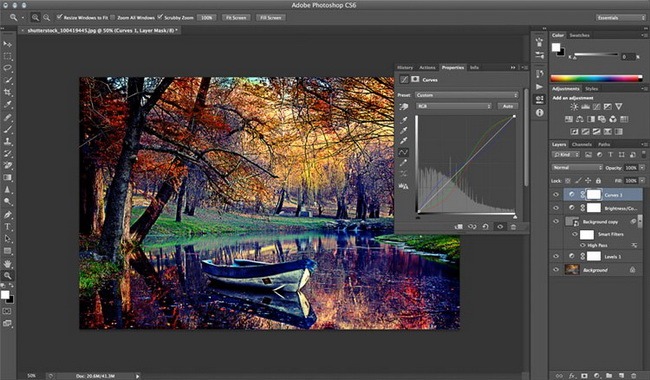
Step 6. Mute the image
Next, mute the colors while keeping the warm tones added earlier.
Select the Background layer and add a new “Hue/Saturation” adjustment layer.
Move Saturation to -25 and Brightness to +5.
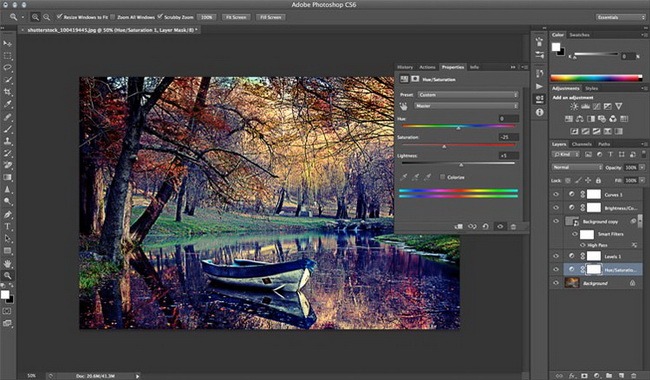
Step 7. Add a touch of noise for authenticity
Digital photos are mostly precise and smooth, so a vintage effect looks more realistic if a little grain (known as noise in digital) is added.
Create another copy layer and go to “Filter > Noise > Add Noise”.
Resist the temptation to crank it up! For this image we used 12, as it is quite detailed and the noise will show more.
If the image has fewer details, use a smaller value.
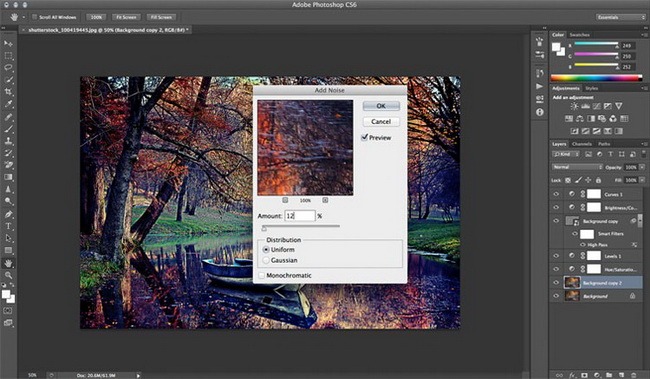
Step 8. Add a little magenta
Merge the layers, then go to “Layer > New Layer” and fill it with magenta.
To do this, go to Edit > Fill, choose “Color” from the Use drop‑down (Edit > Fill > Color) and set R255, G0, B255.
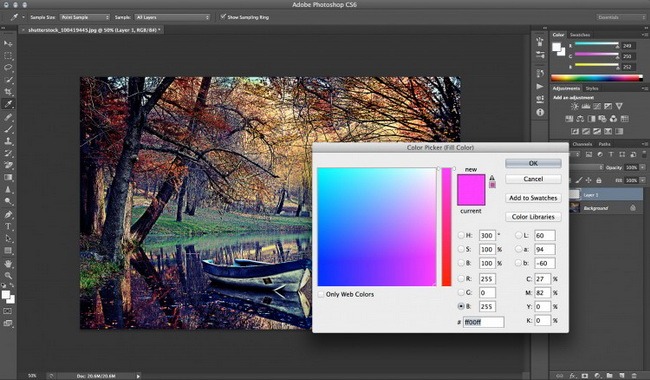
Step 9. Change the blend mode
Set this layer’s blend mode to “Screen” and reduce Opacity and Fill to about 10% or a bit more, depending on the image.
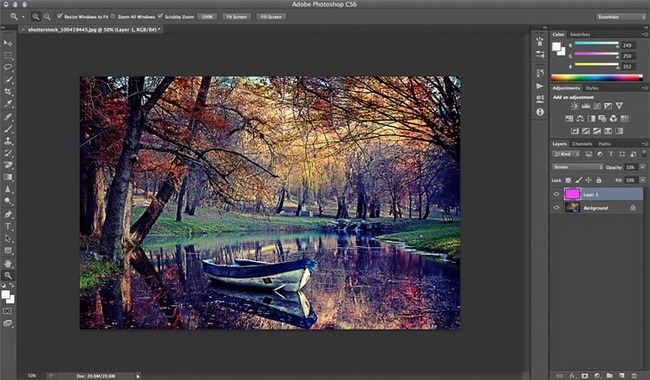
Step 10. Finally!
Merge the layers again and go to “Layer > New Adjustment Layer > Color Balance”.
Choose Midtones and set Cyan‑Red to -40 and Yellow‑Blue to +20.
One last merge and voila!
The vintage image is ready!
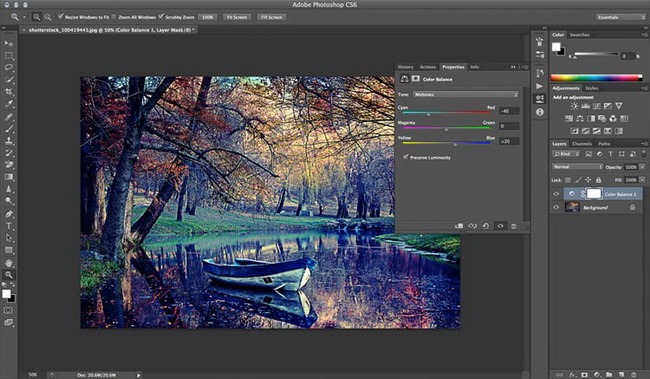
Note that adjustments can be made at every stage of this tutorial, based on personal preferences and the desired outcome.
original: www.shutterstock.com/blog/how-to-make-photos-look-vintage-in-10-easy-steps
This article is available in the following categories: About Microstocks


