How to Properly Age a Photo?
0
Let’s see how any photograph can be turned into a relic of the past, or simply put, how to age a photo, using the digital tools available in Adobe Photoshop.

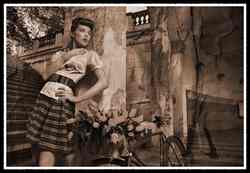
Let’s start our experiments with this photo number 75811891, by the contributor Konrad Bak.

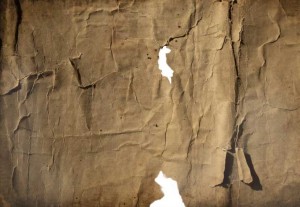
First, find or create a texture with lots of wrinkles, scratches, or any other similar heavy texture.
In the search for the required texture, the Shutterstock stock photography agency will easily help, offering a wide variety of textures. For the first part of this tutorial, we use image number 61282714 by the contributor cla78.
Insert the texture into the photograph on its own layer. Change the Blend Mode. Try several options. Overlay usually works best, but you can also try Screen or any other mode depending on the colors of the original image and the texture.
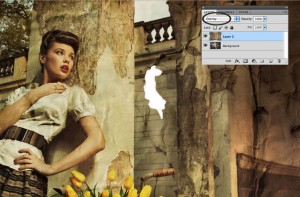
With this step you have already achieved a good photo aging effect, but removing color will truly send the photo back in time.
Go to Hue/Saturation.
Make sure to tick the Colorize checkbox, then use the following settings: Hue – 25, Saturation – 25 to create a sepia tone.
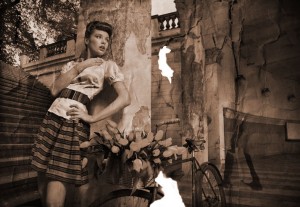
After that, press Ctrl+Alt+Shift+E or Cmd+Opt+Shift+E to merge the visible layers into a new layer.
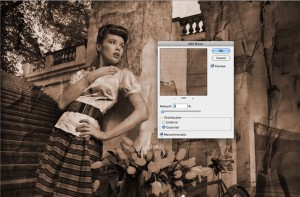
To add grain to the photograph, go to Filter > Noise > Add Noise.
Choose Distribution to Gaussian and tick the Monochromatic checkbox.
Set the percentage of grain needed for the best appearance of your image.
For additional aging, use the Dodge or Burn tools on specific dark or light areas of the photograph as desired, for example to add a bit of darkening to cut edges, creating the impression the photo was singed.
Here is the result!
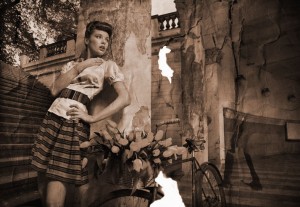
Now, suppose you already used a wrinkle texture that does not tear at the edges like the one we used earlier.
You can use the following technique to add torn edges, which will significantly increase the realism of the image.
First, perform the steps described above to obtain this image.

Create a new layer under the aged photograph. Fill the background of this layer with a color, for example a brown gradient, and once you do this, the torn edges will become more noticeable.
Select the photo layer again and create a white border around it. To create it, use a rectangular selection, leaving a thick line between the outer edge of the selection contour and the edge of the photograph.
Press Ctrl+Shift+I to invert the selection so that the left out stripe is selected. Fill it with white.
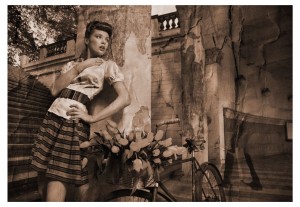
Now make another selection roughly halfway between the edge of the entire image and the edge of the photo.
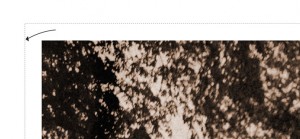
Press Ctrl+Shift+I again to invert the selection. This time press Q to enter Quick Mask mode.
The central part of the image, the part that is not part of the selection, should become tinted red. Activating Quick Mask mode will allow the selection to be edited just like pixels, for example with a brush or filters.
Go to Filter > Brush Strokes > Spatter. Set a fairly small Spray Radius and a medium Smoothness level.
Click OK, and you will see that the edges of our red Quick Mask now look quite ragged.
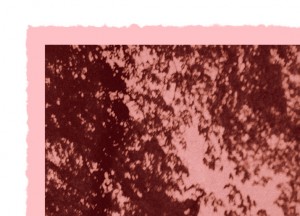
Press Q to deactivate Quick Mask mode. Press Delete on the keyboard to remove the torn selection outside the image, leaving only pleasing photo edges.
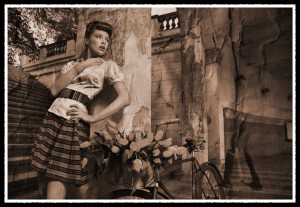
Try this method of aging a photograph with different photos and different colors to see and understand exactly which retro variations of photos you can create on your own!
Original source:
Author: Karl Rosencrants
Link: blog.shutterstock.com/2011/09/aging-photoshop-tutorial/?sid=SEPNLS&utm_source=mainimage&utm_medium=email&utm_campaign=SEPNLS


