Sign up as a Dreamstime Contributor
7
Dreamstime Stock Photo Agency, commonly referred to as DT by microstockers, is one of the stock photo sites where a beginner should register first. This platform provides the foundational experience necessary for success in microstock photography. The first step on the DT will be registration. So, let’s consider the registration process on Dreamstime.
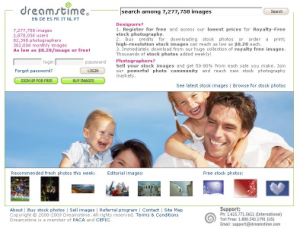
Registration on Dreamstime is quite clear and simple. Initially, go to the DT website. A banner with a link to Dreamstime is displayed on the right side of the page. Next, click the green button ‘Sign up for free’ button located below the login and password fields.
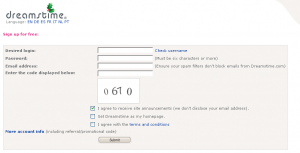
On the next page, you need to fill out the registration form. All information should be entered in English, using Latin characters. Please note this important detail.
In this Dreamstime registration form, you will need to fill in the following fields:
Desired login – enter the username or nickname you wish to use for your Dreamstime account. Next to it is the ‘Check username‘ field (marked with a red arrow). Clicking this field allows you to verify the availability of your chosen username on Dreamstime. If your chosen username is already taken, a message will inform you, along with a list of similar available usernames. You can select one of the suggested usernames or check the availability of another.
Password – create a password for your Dreamstime account.
E-mail address – enter your valid email address, as a confirmation email will be sent to it.
Enter the code displayed below – this is a captcha (anti-spam code) shown in the image below. Enter these characters into the field above the image. Ensure you enter the code correctly.
Next, you’ll see several options, each with a checkbox. You can:
– subscribe to the Dreamstime newsletter.
– set the Dreamstime as your homepage.
– agree to Dreamstime’s terms of service. This field must be checked.
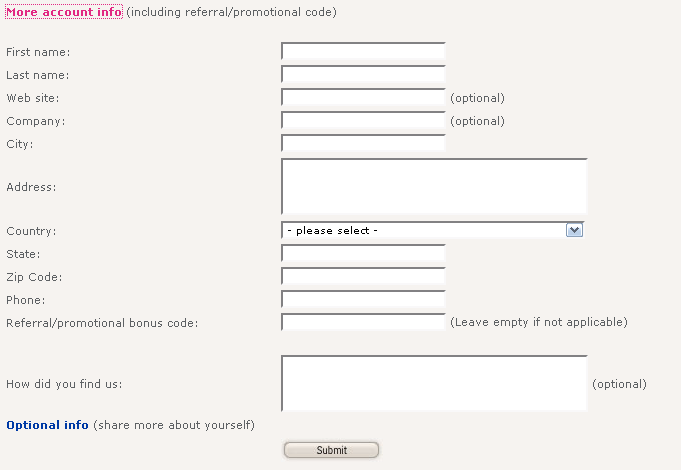
Clicking ‘More account info’ below the checkboxes will display additional fields, as shown in the screenshot:

Here, you can enter your personal information for your Dreamstime profile. All fields should be completed in English (using Latin characters):
- First name – enter your given name.
- Last name – here you need to enter your last name.
- Website – this field is optional. You can enter your website or blog here if you have one. If not, just leave the field blank.
- Company – an optional field. You can specify the name of the company you work for.
- City – enter your city.
- Address – in this field, write your address. Address format: street, house number, apartment.
- Country – select your country from the dropdown list.
- State – an optional field for indicating your area, state, or province. You can just write your city again or specify the area here.
- Zip code – enter your postal code.
- Phone – enter your phone number in international format (starting with a plus sign).
- Referral/promotional bonus code – an optional field.
- How did you find us? – in this field, specify how you learned about Dreamstime. Literal translation: “How did you find us?” Here you can put a link to my blog – https://microstock.top/.
Clicking the ‘Optional info (share more about yourself)‘ label allows you to add more details to your Dreamstime profile. The following optional fields will be offered for completion:
- Your photo – Here, you can choose and upload a profile picture to the Dreamstime website, which will be displayed in your account later. This can personalize your Dreamstime account. This field is also optional.
- Bio / Artistic statement – optionally, provide your biography and artistic preferences.
- Equipment – here you can select the type of equipment you work with. You can choose from three options: ‘digital’, ‘film’, or ‘both’. If you are an illustrator – then choose the ‘digital’ option. This field is optional.
- Equipment details – in this field, you can elaborate on the equipment you use for your work. You can detail the manufacturers and models of the equipment you use. This field is optional.
- Favorite subjects – your preferred subjects, such as portrait, landscape, or illustration.
After filling in all the fields required by Dreamstime, you need to click the Submit button – and you are registered. Shortly thereafter, a registration email with congratulations and confirmation of registration should arrive in your inbox from DT.
And that’s it! You can start earning on the Dreamstime website.
By the way, if you don’t click on the More account info link during the registration on Dreamstime and don’t fill out this bunch of fields, nothing terrible will happen. Dreamstime will register you, but possibly later, for example, when you request a withdrawal from Dreamstime, they may still ask you to provide this information.
This article is available in the following categories: About Microstocks, Dreamstime


I have registered on Dreamstime. How do I upload already finished works (vector) to the photobank?
I will answer both questions here.
Dreams says that they need JPGs, and everything else is at the author’s discretion. However, as practice shows, vectors are quite popular among buyers of this stock.
So, JPG requirements: from 3 MP to 70 MP, RGB, without noise and other artifacts. Besides JPG, you can also upload alternative formats such as AI, PNG, CDR, or EPS (with the version at the author’s discretion, but it’s better not to upload versions higher than 10.0, as more graphic editors read those). The process itself is a bit confusing, but I will try to explain it step by step:
1. First, we upload JPGs.
To do this, on your “Management area” page, click the “Upload Images” button (second row, third column) (note! you need to click the button, not the text below it) and choose the desired upload method:
Upload single file – upload a single file. Here it’s simple – click browse, select the file, click “Submit,” wait for the upload to finish, and go to the “Management area.”
Upload multiple files – upload multiple files. You need to ensure that the “Use JavaScript” checkbox is checked in your browser settings. You may also need to install a plugin for uploading. You will find everything you need on this page under the link “Click here to activate multiple file uploader.” Then, as with single uploads, select the files, wait for the upload to finish, and go to the “Management area.”
Upload via FTP – if you plan to upload more than once and not just one file a week, I recommend figuring out FTP uploads – it’s the fastest and easiest method used by most stocks. First, you need to activate FTP, and the profile details will be visible on the right at the bottom of this page.
It’s worth noting that after uploading via FTP, the files won’t appear on the site immediately; Dreams promises a delay of 15 minutes to several hours, but it usually takes about 3-5 minutes. You can see what was uploaded via FTP before the files become available for further actions by clicking the (History) link located under the “Upload Images” button on your “Management area” page.
2. Unfinished files.
So, JPGs are uploaded, and now we are back on the “Management area” page, click the “Unfinished Files” button (second row, second column) (it shows how many files are waiting for processing in parentheses). On the opened page, we see a table with our files – preview, ID, upload date. Then, there are three buttons –
COMMERCIAL RF – the one we need. Here we will describe our work further.
RF (no keywords) – if you have a lot of money and little time, you can ask the inspector for help, and for a small fee (40 cents per task), they will choose the keywords and categories for you.
EDITORIAL – this is for editorial, non-commercial works. We are talking about vectors, so we don’t go here.
Next, there is a column for deleting mistakenly uploaded images. The last option is to delete the file yourself))
3. Fill in the information.
I won’t say much here; I hope you are using IPTC. I will explain just a few points.
In the “Description*” field, write: Additional format EPS 10.0 (for example, if you have the 10th), so the buyer knows they can find the vector.
In categories, you must select “Illustrations&Clipart > Vector” at least in one.
Keywords should be only single words; no phrases.
The first checkbox in the description block – agreement with the terms and conditions of uploads.
The second – agreement that in case of refusal, your image will be available for download under RF-LL licenses for free.
Checkboxes in the “Rights management area”:
The first – confirmation of the exclusivity of the image.
The second – consent for web use.
The third – consent for print use.
The fourth – consent for the sale of rights. If such a purchase occurs, you will need to remove the image from all portfolios on all stocks, sites, and blogs.
Once everything is filled in, click “Submit.”
4. Alternative format.
Immediately after confirmation, we are redirected to the alternative format upload page – here we upload our vectors. One at a time. Not very convenient, but it is what it is.
If you didn’t click “Browse” in time, you’ll be taken to the unfinished files page. No worries – you can upload vectors from the “Pending Files” page, which you can access from the “Management area” by clicking the appropriate button (second row, fourth column). Here we see our files sent for review and the approximate time when they will be checked (the time is very approximate). I also want to note that alternative files can only be uploaded to files that are not under review or have already been approved. To do this, click the “Edit” button, and at the very bottom, before the confirmation buttons, you will see a field for uploading alternative formats. Select the file, wait for the upload to finish, and click “Submit.”
Hooray! The vector upload is complete! Now just wait for approval.
One little caveat! If you didn’t manage to upload the vector and the file is under review (not waiting, but already being reviewed), it may not be accepted due to the absence of the specified format or keywords like “vector,” “eps,” etc. Try to upload vectors right away!
Another nuance – there are upload limits on Dreamstime, but they are quite high.
I hope I explained everything. If you have more questions, feel free to ask, and I will respond. Good luck!
Thank you for the article; everything is laid out clearly. Many people are interested in stock photo sites, and this will be useful.
Hello! I am 47 years old, and I recently learned how to use the internet (moving from Yandex to other spaces). Could you please explain how to make your wonderful blog come to my email? You rarely find what you really need! Thank you very much for the time you have given me! I hope for your reply, and maybe I can be of help to you too.
Good afternoon, Alexey!
At the end of each article, there is a form to subscribe to updates via email; just enter your email address and click the button, and that’s it.
Hello! I really liked your blog, but I can’t connect the RSS feed. Maybe I’m doing something wrong—please advise where to click and whether it works for you at all? Thank you in advance!
Click on the orange Feedburner icon at the bottom of the page, and happiness will come to you
Hello! I am close to your topic and even plan to create a blog in the same direction. Could you, if it’s not too much trouble, send me information on how to contact you by email? Unfortunately, I couldn’t find your email address on the site, and I would like to hear your advice. Thank you in advance!